Introduction
This blog is dedicated to understand the branching concept of Git
As a Git user, you must be acquainted with the branching concept. Also, must be in common practice of directly merging all of your code into the master branch.
But do you know merging into master directly can seize your chances of:
a. exploring/playing with new features
b. deleting the branch and make a fresh start
Git flow
introduces a branching strategy with variety of branches namely, develop, master, feature, release and hotfixes. This strategy however adds to the complexity and annoying troubles.
Troubles for instance, as a developer you should use develop branch and not the master. As master branch is primarily dedicated to the stable code which can be pushed to production for release. However, by convention the default branch is ‘master’ and it becomes exasperating to switch branches every time. With release and hotfix branches, complexity adds up.
GitHub
has come up with a simplified workflow, wherein; only feature and master branch exists to play with. This not only minimizes complexity, but also reduces the code quantity in inventory. Furthermore, it is in accordance with lean and continuous delivery practices. But various issues with regards to the deployment, environment, integration and releases still remains unsettled.
After this short story about branching flow and the related bottlenecks, let’s dive into the next category of branching strategy, i.e. GitLab flow.
GitLab flow
according to the requirement of the project you can have simple feature-master-production branch flow or feature-master-preproduction-production environment flow or can also include release branch in case your software requires frequent releases.
However, the basic branching practice here, requires ‘master’ branch to be the protected as well as the current stable code branch. By protected it means that only an authorized (maintainer or admin) personnel would be able to push into this branch. Code in master branch is deployment ready and can be merged into production.
As a developer you would be required to work on a feature branch and you can always share your work with other team mates for review/feedback. Team mates can provide feedback via comments and if any flaw is detected then a fix can be pushed by the merge request initiator.
After a cycle of new code addition, deletion and testing onto the staging server, when you feel confident then you can issue a merge request and assign it to the authorized individual (maintainer role). The assignee can still review and either can pass your merge request via merging it with the ‘master’ branch or can give you feedback to deal with some corner cases or can simply close the merge request.
GitLab branching:
Let’s peek into the step by step process for creation of GitLab branches. We will also see how merge request can be issued and handled by the assignee.
Before we move further, just revise the best practices:
- There should be no direct commit on the master branch. One should make use of feature branches.
- Code review should be done before merging into master branch.
Step 1.
Go to the project -> Repository -> branches
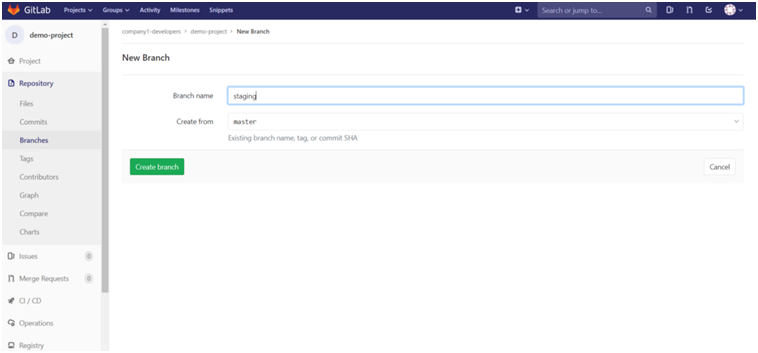
Provide the name of the branch and then hit the ‘Create branch’ button.
One can create protected branches as;
- Except user with Maintainer permission, nobody else can create them.
- Except user with Maintainer permission, nobody can push into it.
- Anyone can not delete or force push into these branch types.
- A GitLab admin is allowed to push to the protected branches.
- Master branch is protected by default.
- This avoids direct merging without reviewing.
Step 2.
Assume three members (with developer role) has read/write access to the project.
When a developer (e.g. [email protected]) will accept the invitation and will login (after signup) into the GitLab, he/she would be directed to the only group (company1-developers) for which they have permissions.
The user has the permission to :
- clone the project
- create a feature branch
- commit the changes in the feature branch
- push the branch to the gitlab
- create a review or merge request
- team lead can review and then either accept or discard the merge request from feature branch to master branch
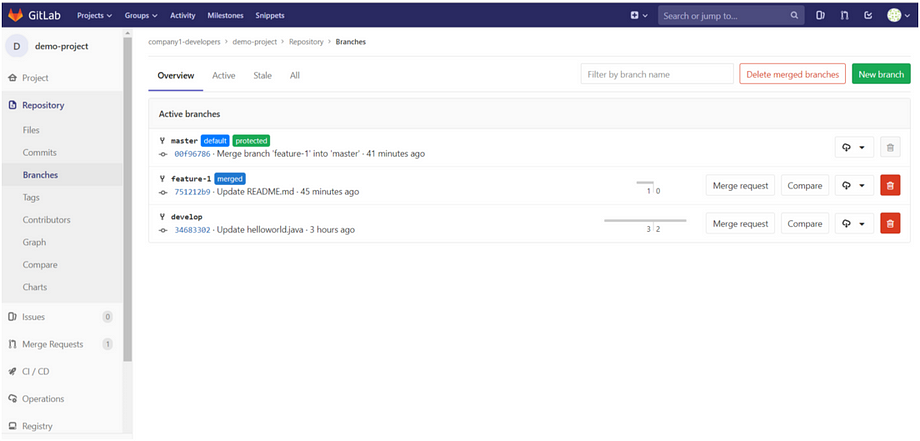
Current branches in the project/repository:
Step 3.
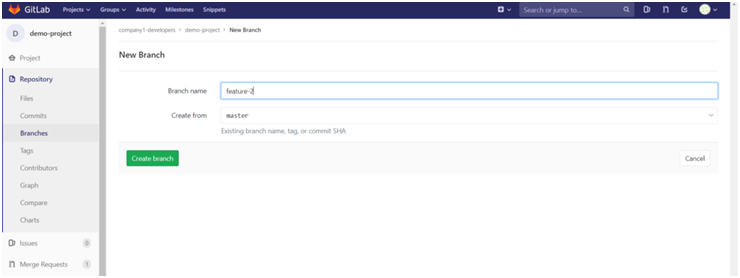
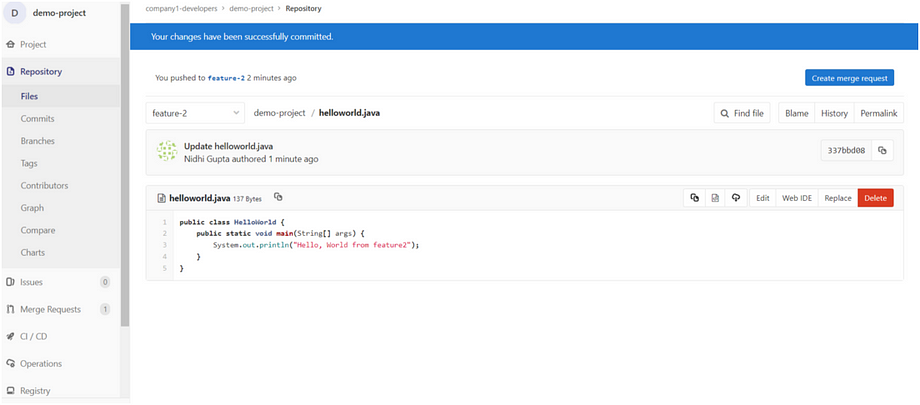
Developer will create a feature-2 branch (either through GUI or CLI) :
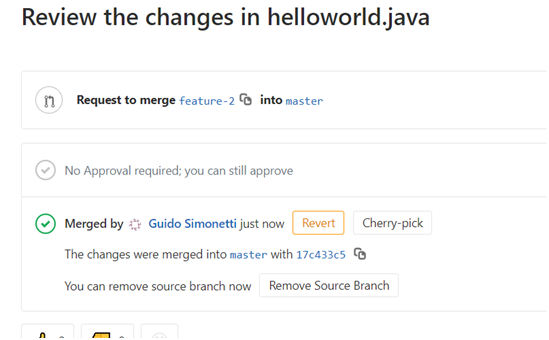
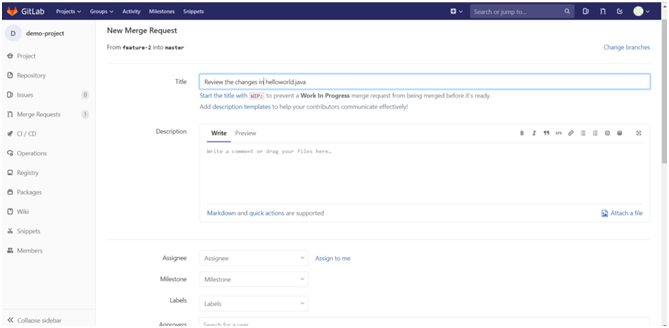
Then edit the helloworld.java and commit the changes. Still the changes are with feature-2 branch. Then the developer can issue a merge request as following:
Click on ‘Create merge request’
One can directly submit to the assignee the merge request or can start the title with WIP to show work in progress and thereby only a feedback is required.

Step 4.
Now the team lead when sign in GitLab, the merge request and to do list will have notifications (both can be find out in the right top most corner of the dashboard).
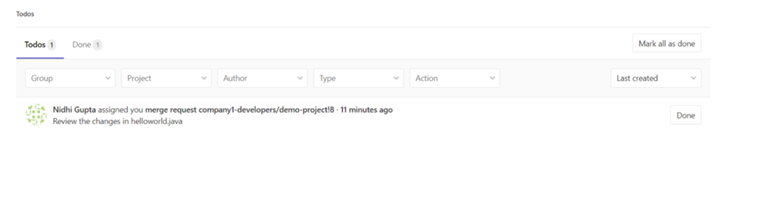

Once the team lead accepts merge request, it will disappear from todo list.