This blog will help you do the TeamCity-Installation on your windows machine
Introduction
TeamCity is a CI server from JetBrains and comes with a lot of features out of the box to get you started quickly with CI for your projects.
As a CI server, TeamCity can detect changes in version-control repositories and trigger builds whenever new code is checked in. TeamCity can be configured to perform the build activities, which includes the compilation of source code, running unit tests and integration tests, deploying the built executables into a testing environment to perform functional tests, and exposing artifacts for downloads.
Installation on Windows
- Download the software from the below
- http://www.jetbrains.com/teamcity/download/.
Installing the server and the default agent
The steps involved in installing TeamCity using the installation package are as follows:
- Double-click on the downloaded
setup exefile. It should bring up the installation wizard like any other setup file on Windows. Accept the license and proceed to the next step. - The next step in the wizard is to choose the installation directory. This is where the TeamCity server (and agent) will be installed. The default directory is
C:\TeamCity. We will be calling this<TeamCity Home directory>. - Since the package includes both the server and the agent, the next step asks you to choose the components to be installed. You can choose to install the server, the agent, and also choose whether Windows services need to be set up for each of these components. It is recommended that you set up the server and the agent as services.
- Next, you will have to choose
<TeamCity Data directory>. This is the path where TeamCity will store its configuration, build history, users, and other data. The default for this is%ALLUSERSPROFILE%\JetBrains\TeamCity.
Continuing on, the installation copies the files and sets up TeamCity. The next bit of configuration that needs to be set is the port for the server. The default is 80. You will get the below page of all the configuration
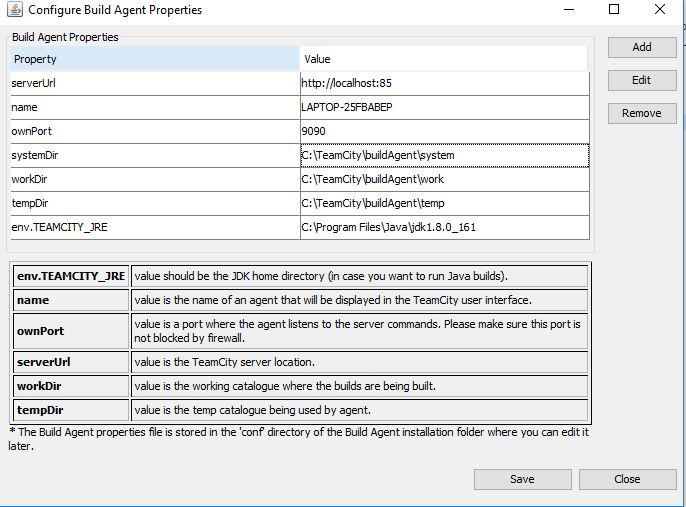
Windows Services will get created as shown below :

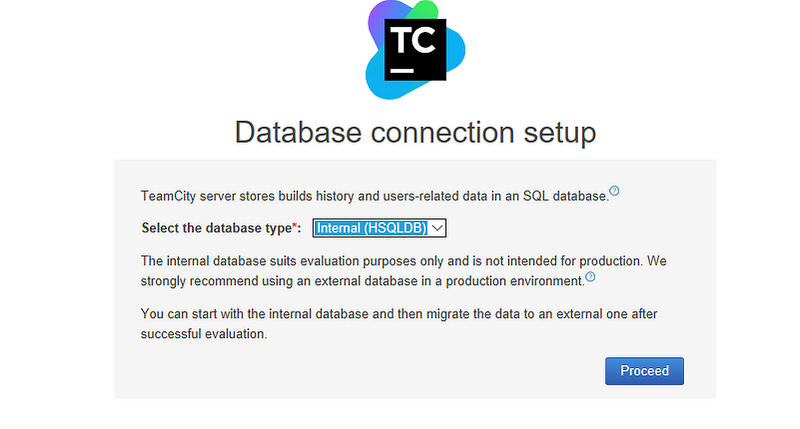
Open the url on your browser : http://localhost:85/login.html and do the steps as follows


Finally, basic installation of the TeamCity server and agent is up and running.