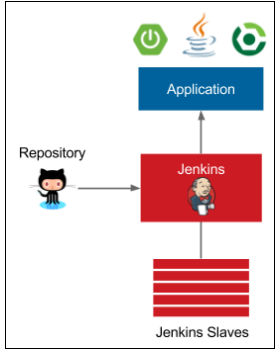
This blog will help you to setup a CI/CD pipeline using Jenkins and Docker. It includes automation using Jenkins Pipeline/Groovy scripting language, it uses sonar for code quality and artifactory for artifactory management
Tools:
Jenkins- CI/CD
Git/GitHub — Source Control Management
Docker — Container
JaCOCO — Code Coverage Tool
Gradle — Build tool
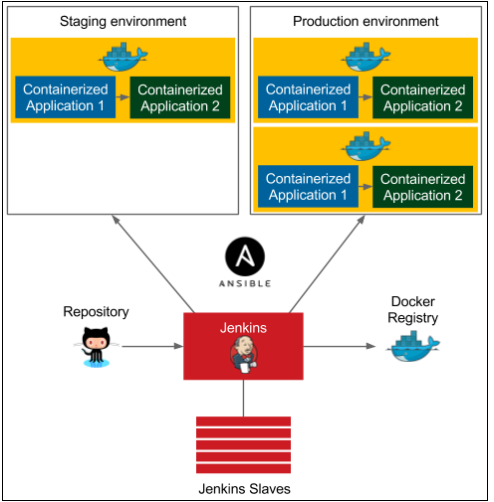
Ansible — Configuration Management
Ansible/Github/Docker/Cucumber/
Configuration Management with Ansible
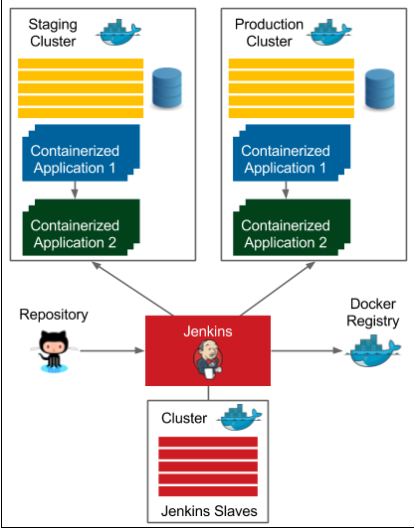
Clustering with Docker Swarm/Advanced Continuous Delivery
Docker Installation: Click Here
Jenkins setup on AWS
Java 8 should be present,if not please use the below command
Install JAVA 8
yum install wget ( in case wget is not found)
$ wget --header "Cookie: oraclelicense=accept-securebackup-cookie" http://download.oracle.com/otn-pub/java/jdk/8u161-b12/2f38c3b165be4555a1fa6e98c45e0808/jdk-8u161-linux-x64.rpm$ sudo yum localinstall jdk-8u161-linux-x64.rpmexport JAVA_HOME=/usr/java/jdk1.8.0_161/
export JRE_HOME=/usr/java/jdk1.8.0_161/jre
PATH=$PATH:$HOME/bin:$JAVA_HOME/bin
export PATH
sudo alternatives --config javaInstall Jenkins
sudo yum update
sudo wget -O /etc/yum.repos.d/jenkins.repo http://pkg.jenkins-ci.org/redhat-stable/jenkins.repo
sudo rpm --import http://pkg.jenkins-ci.org/redhat-stable/jenkins-ci.org.key
sudo yum install jenkins
sudo service jenkins start
Install Git on Jenkins server
yum install git
Open the url in the browser. Default port is 8080
It will ask for the initial password, please run the below command
cat /var/lib/jenkins/secrets/initialAdminPassword
Configure Jenkins with JAVA_HOME,MAVEN_HOME
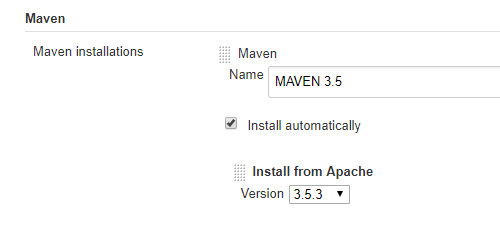
Go to Manage Jenkins ->Global Tool Configuration
Add JDK -> JAVA_HOME -> put the java_home path of the machine

Add MAVEN -> Select Install automatically.
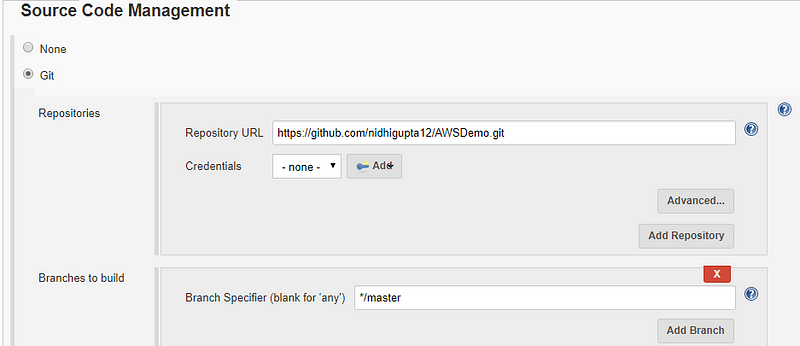
Create a freestyle project in Jenkins
In source code management put this url as shown below “https://github.com/nidhigupta12/AWSDemo.git”
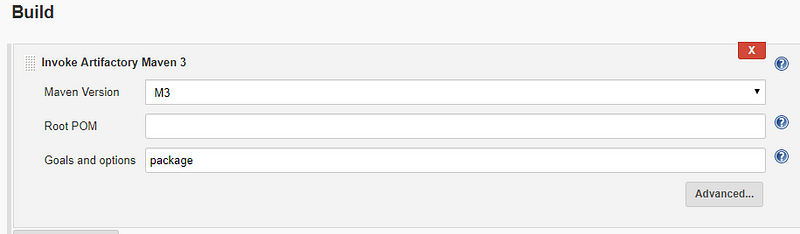
In Build Section,select maven version and goal which you want to execute as shown below. This is very important, you have to select invoke Artifactory maven 3 only not the invoke maven top level targets.
Trigger the Build
Output of this job
[INFO] Packaging webapp
[INFO] Assembling webapp [LoginWebApp] in [/var/lib/jenkins/workspace/Test_Maven/target/LoginWebApp]
[INFO] Processing war project
[INFO] Copying webapp resources [/var/lib/jenkins/workspace/Test_Maven/src/main/webapp]
[INFO] Webapp assembled in [732 msecs]
[INFO] Building war: /var/lib/jenkins/workspace/Test_Maven/target/LoginWebApp.war
[INFO] WEB-INF/web.xml already added, skipping
[INFO] ------------------------------------------------------------------------
[INFO] BUILD SUCCESS
[INFO] ------------------------------------------------------------------------
[INFO] Total time: 01:36 min
[INFO] Finished at: 2018-03-27T20:59:52Z
[INFO] ------------------------------------------------------------------------
Finished: SUCCESS
Install Jfrog Artifactory. Click Here
Now storing the artifacts to the jfrog artifactory
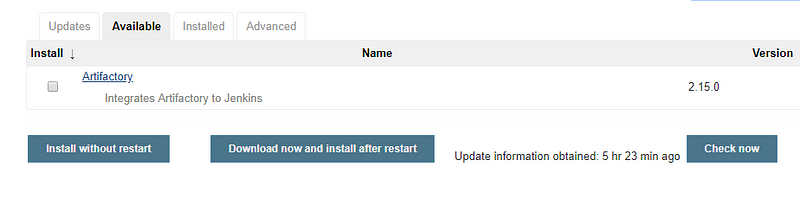
Integrate Artifactory with Jenkins
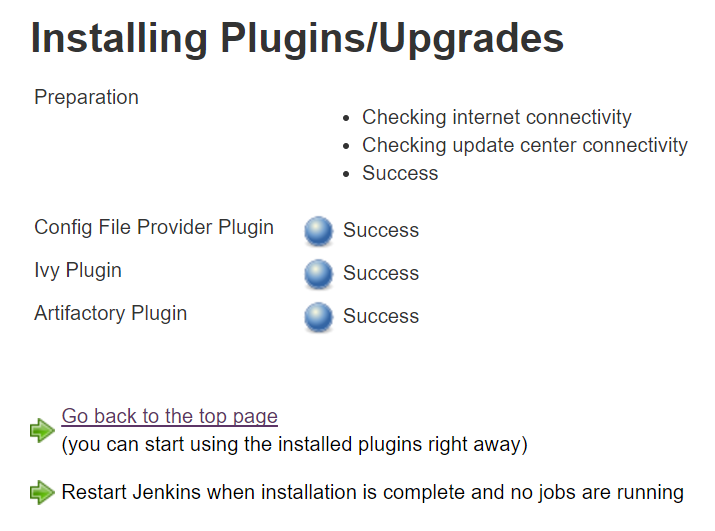
Go to Manage Jenkins -> Manage Plugins
Once plugin installation is successful, you can configure Artifactory-related settings in Jenkins:
Configure Artifactory in Jenkins:
Go to Manage Jenkins ->Configure System
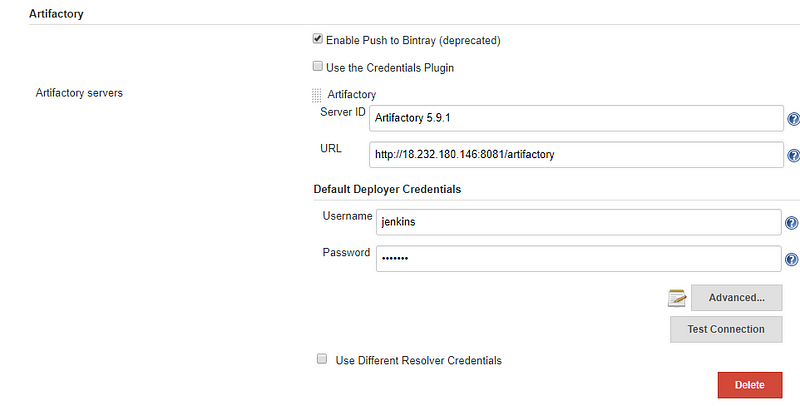
- Go to Section “Build Environment”
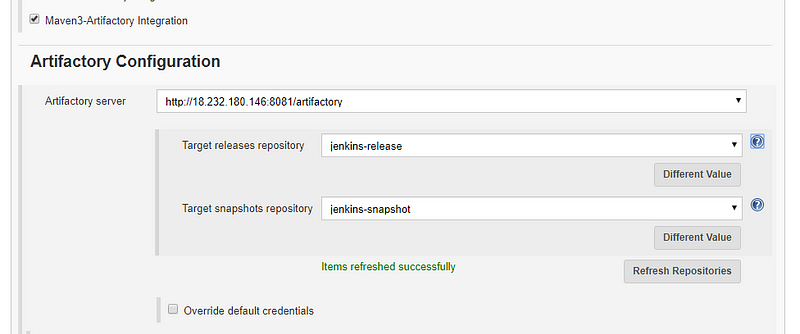
3. Select Maven3-Artifactory Integration
4. Click on Refresh Repositories and select the repository in the release and snapshot field from the lists:
Add Build Step as shown below
- Save and click on Build now and verify logs in the Console Output. Jar files are resolved from the local repository or Artifactory:
- Once the package is created, it is stored in Artifactory too:
[main] INFO org.apache.maven.plugin.war.WarMojo - Webapp assembled in [85 msecs]
[main] INFO org.codehaus.plexus.archiver.war.WarArchiver - Building war: C:\Program Files (x86)\Jenkins\workspace\Test_Maven_MyProject\target\LoginWebApp-1.0-SNAPSHOT.war
[main] INFO org.jfrog.build.extractor.maven.BuildDeploymentHelper - Artifactory Build Info Recorder: Saving Build Info to 'C:\Program Files (x86)\Jenkins\workspace\Test_Maven_MyProject\target\build-info.json'
[main] INFO org.jfrog.build.extractor.maven.BuildInfoClientBuilder - Deploying artifact: http://localhost:8081/artifactory/jenkins-snapshot/com/javawebtutor/LoginWebApp/1.0-SNAPSHOT/LoginWebApp-1.0-SNAPSHOT.war
[main] INFO org.jfrog.build.extractor.maven.BuildDeploymentHelper - Artifactory Build Info Recorder: Deploying build info ...
[main] INFO org.jfrog.build.extractor.maven.BuildInfoClientBuilder - Deploying build descriptor to: http://localhost:8081/artifactory/api/build
[main] INFO org.jfrog.build.extractor.maven.BuildInfoClientBuilder - Build successfully deployed. Browse it in Artifactory under http://localhost:8081/artifactory/webapp/builds/Test_Maven_MyProject/10
[main] INFO org.apache.maven.cli.event.ExecutionEventLogger - ------------------------------------------------------------------------
[main] INFO org.apache.maven.cli.event.ExecutionEventLogger - BUILD SUCCESS
[main] INFO org.apache.maven.cli.event.ExecutionEventLogger - ------------------------------------------------------------------------
[main] INFO org.apache.maven.cli.event.ExecutionEventLogger - Total time: 5.419 s
[main] INFO org.apache.maven.cli.event.ExecutionEventLogger - Finished at: 2018-03-30T16:55:43-04:00
[main] INFO org.apache.maven.cli.event.ExecutionEventLogger - ------------------------------------------------------------------------
Finished: SUCCESS
- Go to Artifactory and verify the package:
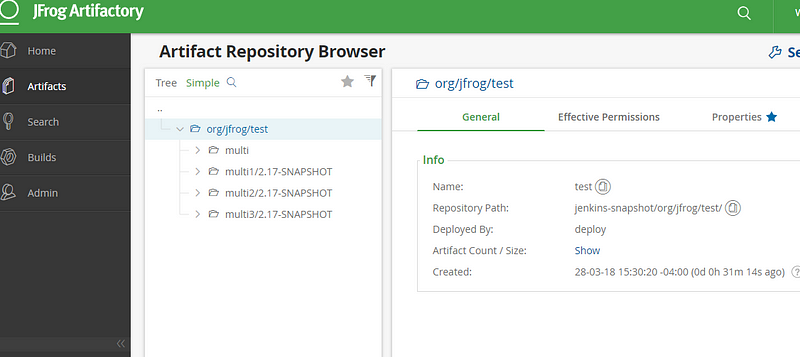
Artifactory setup using maven is completed successfully
Sonarqube Setup
- Download SonarQube from https://www.sonarqube.org/downloads/ and extract it in the system:
- Execute StartSonar.bat/.sh as per OS
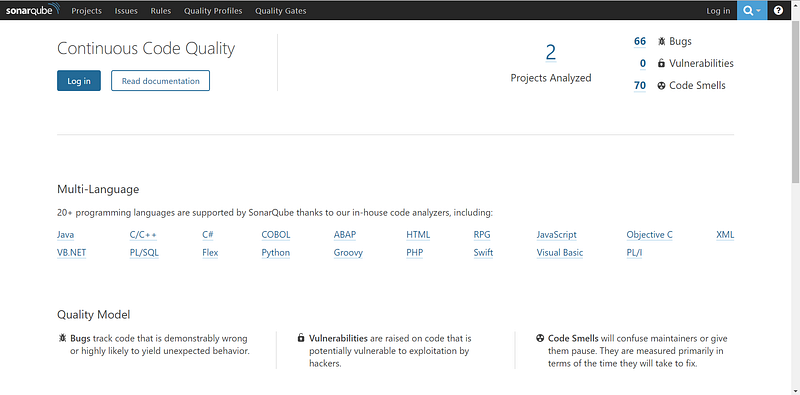
3. Once SonarQube is up and running, open the browser at http://localhost:9000 to visit the SonarQube dashboard
Integrate Jenkins with sonar
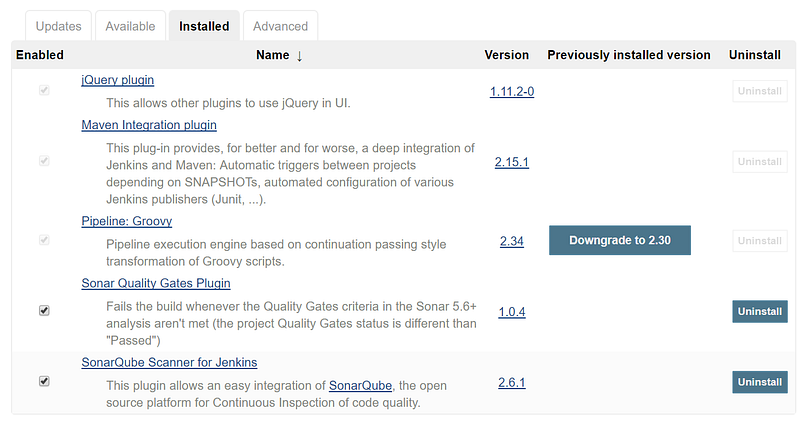
- Go to the Jenkins dashboard and click on Manage Jenkins. Go to Manage Plugins and in the Available tab find the SonarQube plugin.
- Click on Install without restart:
- Go to the Jenkins dashboard and click on Manage Jenkins.
- Click on Configure system and find the SonarQube section.
- Now, let’s go to SonarQube to get the token to integrate Jenkins and SonarQube.
- Once SonarQube is up and running, open the browser at http://localhost:9000 to visit the SonarQube dashboard:
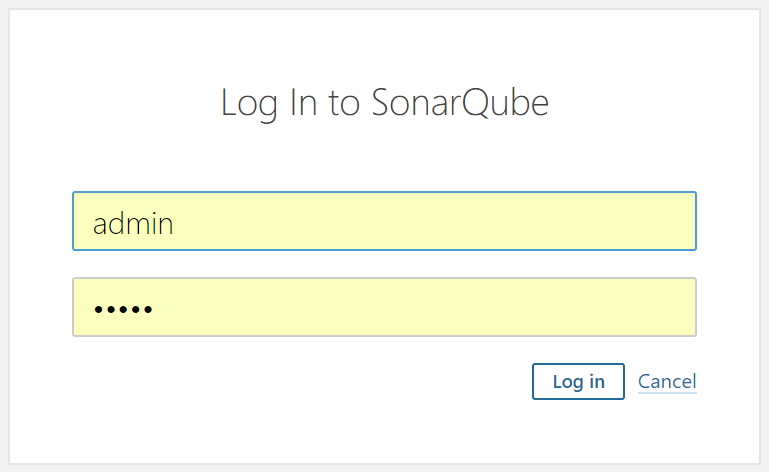
- Click on Login and give the default username and password as admin and default to log in as an administrator.
- Click on Login:
- As of now, there is no project available in the SonarQube dashboard.
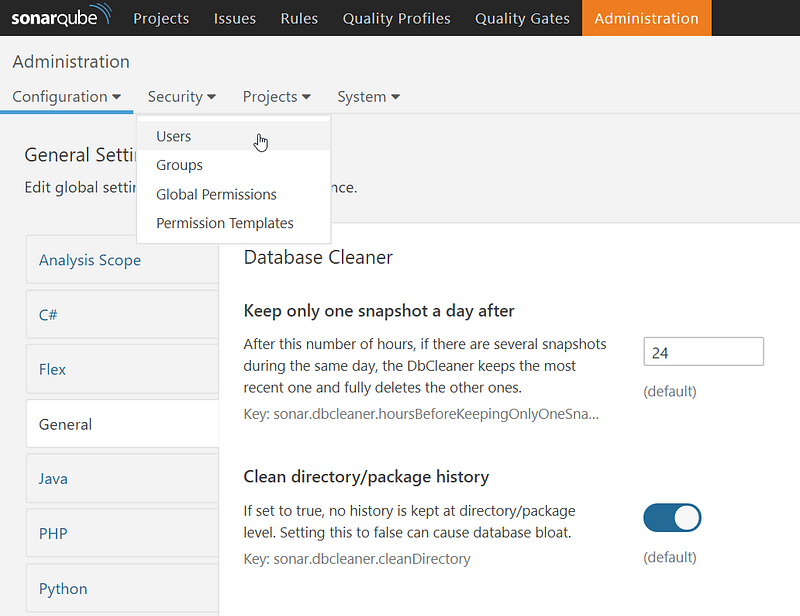
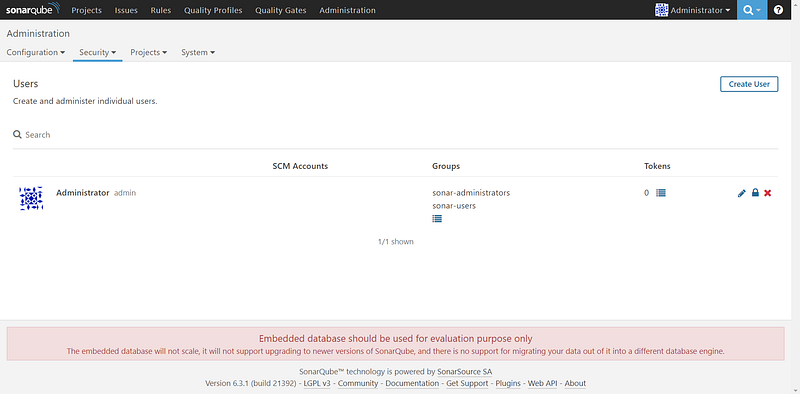
- Click on the Administration tab and in the Security menu click on Users:
- Initially, there are no tokens issued; there is a 0 token for Administrator:
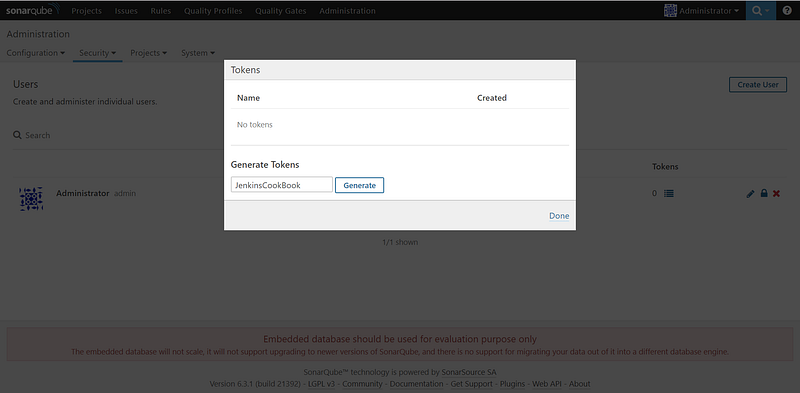
- Click on Tokens:

- Give a name in the Generate Tokens section and click on Generate:
- Copy the newly created token. Click on Done:
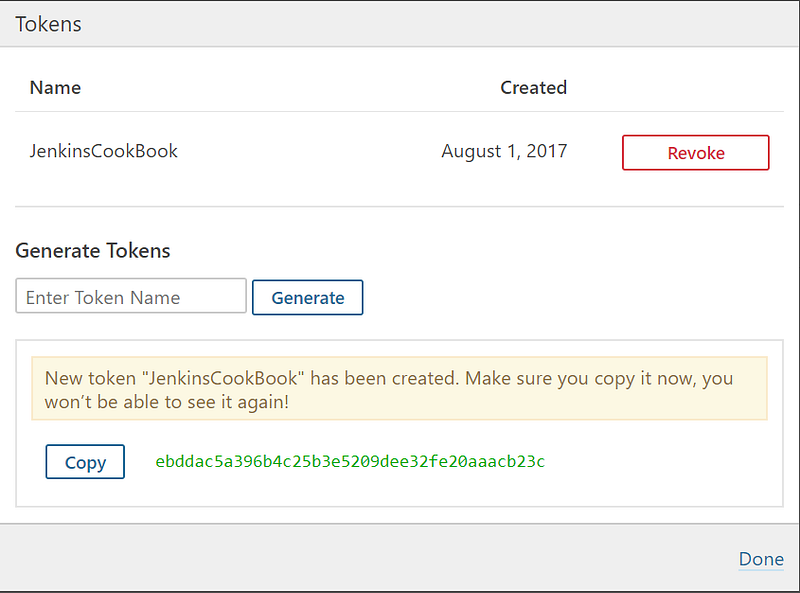
- Verify the number of Tokens for the Administrator user:

- Now we have all the required parameters to integrate Jenkins and SonarQube:
- Go to the Jenkins dashboard and click on Manage Jenkins.
- Click on Configure system and find the SonarQube section.
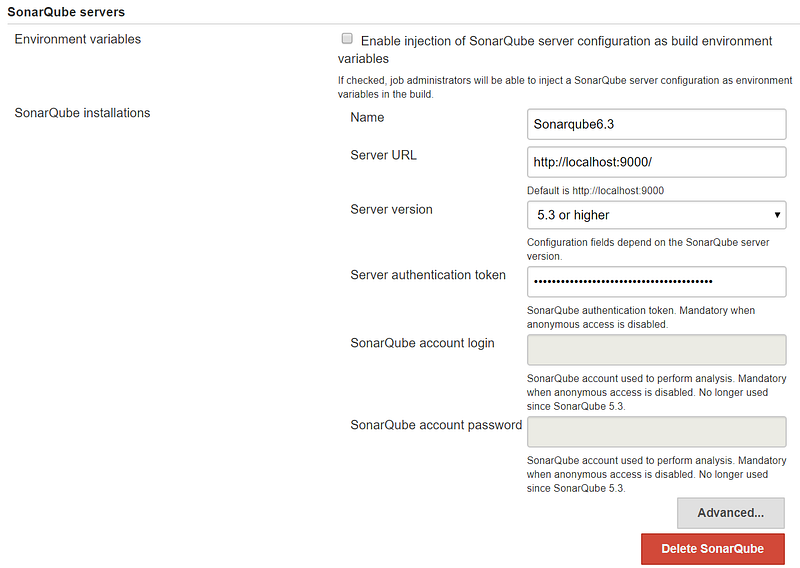
- Click on Add SonarQube.
- Provide the Name, Server URL, and Server version.
- Paste the token value in Jenkins and save it:
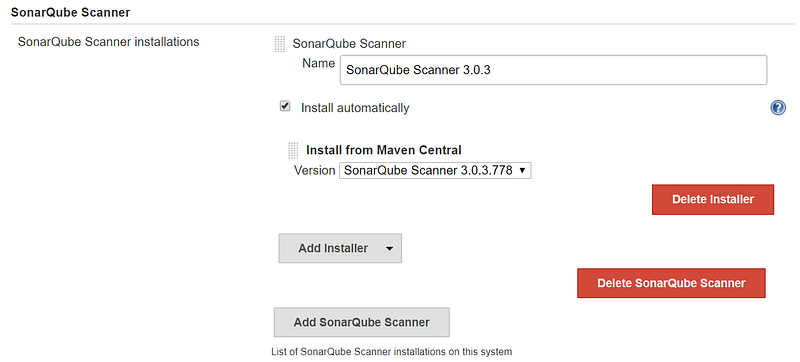
- Go to Global Tool Configuration and configure Add SonarQube Scanner:
- Now, you are ready for the static code analysis of the project.
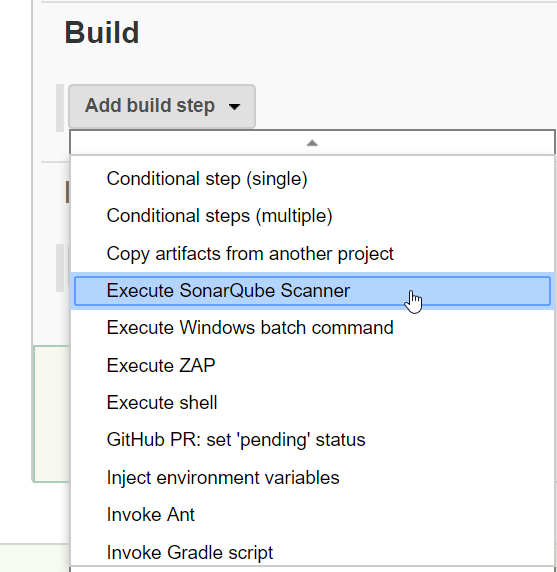
- Go to the Build section and select Execute SonarQube Scanner:
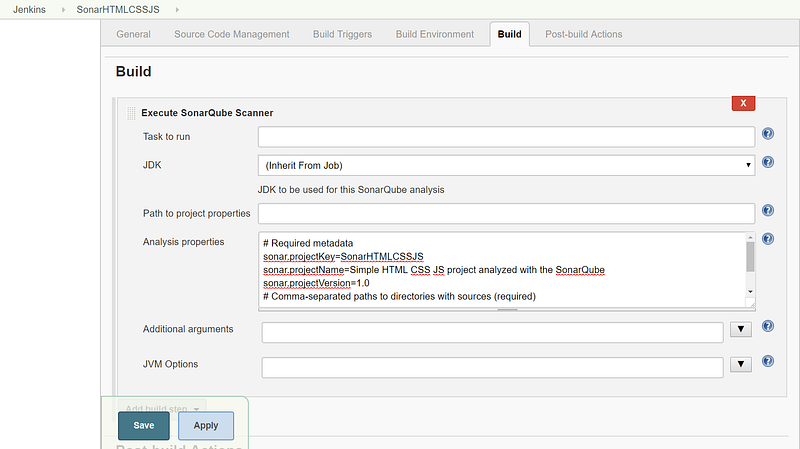
- You can provide the location of sonar-project.properties or provide details directly for static code analysis.
# Required metadata
sonar.projectKey=SonarHTMLCSSJS
sonar.projectName=Simple HTML CSS JS project analyzed with the SonarQube
sonar.projectVersion=1.0
# Comma-separated paths to directories with sources (required)
sonar.sources=.
# Encoding of the source files
sonar.sourceEncoding=UTF-8
  sonar.java.binaries=.
- sonar.sources is the main property for static code analysis. With this property, you inform SonarQube which directory needs to be analyzed:
- Click on Save.
- Go to Jenkins Project and click on Build now.
- Go to Console output to check the logs.
Integrate Jacoco plugin with Maven
- Install Jacoco plugin
- Manage Jenkins -> Manage Plugin -> Search for Jacoco
- Create a freestyle project in Jenkins
- Use this link in source control amangement “https://github.com/pkainulainen/maven-examples.git”
- You have to add all configuration in pom.xml as present in the code

6. Add post build actions
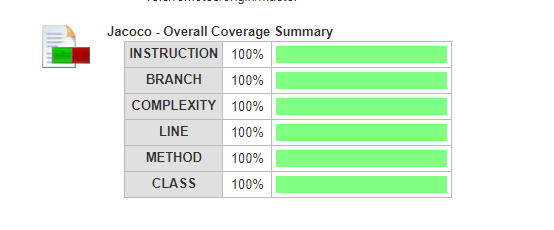
7 Select “Record Jacoco Coverage report”
8. Jenkins build logs as shown below
Configure Jenkins with sample spring boot project using Gradle/Maven
Please refer this link to generate a sample project http://start.spring.io/
All executable(.sh) file should have this permission.
For Gradle, any .sh file should have the below permission else while executing permission denied error comes
git update-index — chmod=+x gradlew
Pipeline Project Using Gradle
Create a Pipeline project in Jenkins and put the below code in the pipeline script and trigger the build
pipeline {
agent any
stages {
stage(“Checkout”) {
steps {
git url: ‘https://github.com/nidhigupta12/calculator.git’
}
}
stage(“Compile”) {
steps {
sh “./gradlew compileJava”
}
}
stage(“Unit test”) {
steps {
sh “./gradlew test”
}
}
}
}
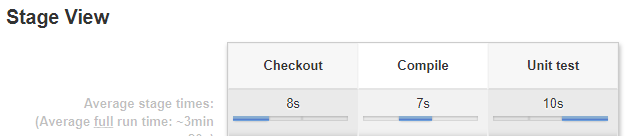
After build is successful, you could see the below output view
./gradlew bootRun
We have created the pipeline script directly in the Jenkins job.
Now we will see how to create the Jenkinsfile and commit it with the source code into the git repository.
Jenkinsfile
Let’s create a file called Jenkinsfile in the root directory of our project
pipeline {
agent any
stages {
stage(“Compile”) {
steps {
sh “./gradlew compileJava”
}
}
stage(“Unit test”) {
steps {
sh “./gradlew test”
}
}
}
}
$ git add .
$ git commit -m "Add sum Jenkinsfile"
$ git push
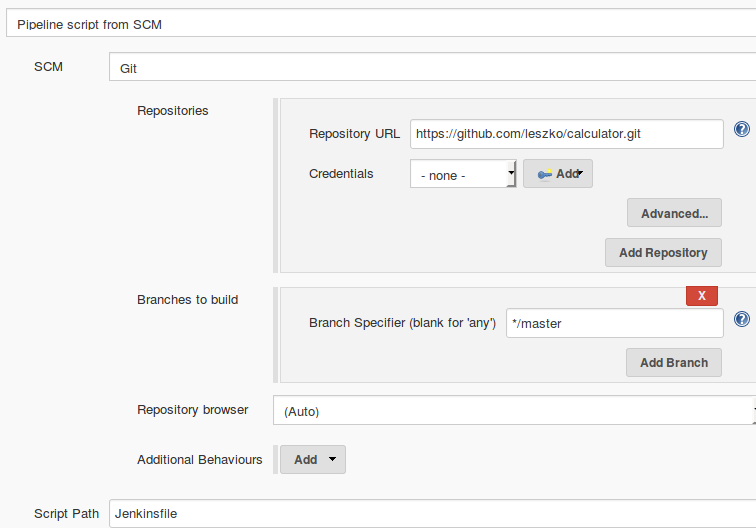
Running pipeline from Jenkinsfile
When Jenkinsfile is in the repository, then all we have to do is to open the pipeline configuration and in the Pipeline section:
- Change Definition from Pipeline script to Pipeline script from SCM
- Select Git in SCM
- Put https://github.com/nidhigupta12/calculator.git in Repository URL
Trigger Build.
Code Coverage
Code coverage is a tool that runs all tests and verifies which parts of the code have been executed. Then, it creates a report showing not-tested sections. Moreover, we can make the build fail when there is too much untested code.
JACOCO
- Add JaCoCo to the Gradle configuration.
- Add the code coverage stage to the pipeline.
- Optionally, publish JaCoCo reports in Jenkins.
In order to run JaCoCo from Gradle, we need to add the jacoco plugin to the build.gradle file by adding the following line in the plugin section:
apply plugin: "jacoco"
Publishing report directly on Jenkins is not working.
No such DSL method 'publishHTML'
stage("Code coverage") {
     steps {
          sh "./gradlew jacocoTestReport"
          publishHTML (target: [
               reportDir: 'build/reports/jacoco/test/html',
               reportFiles: 'index.html',
               reportName: "JaCoCo Report"
          ])
          sh "./gradlew jacocoTestCoverageVerification"
     }
}
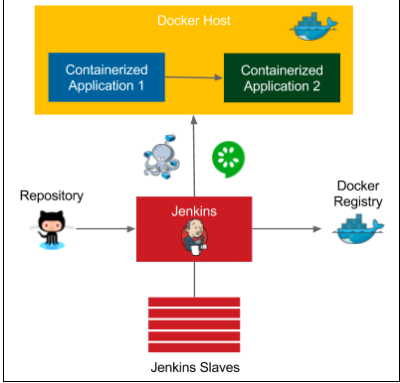
Acceptance test in pipeline
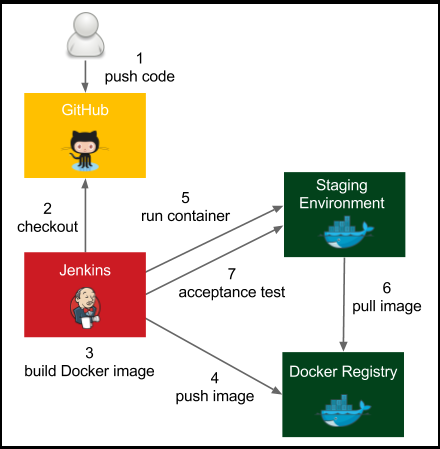
The process goes as follows:
- The developer pushes a code change to GitHub.
- Jenkins detects the change, triggers the build, and checks out the current code.
- Jenkins executes the commit phase and builds the Docker image.
- Jenkins pushes the image to Docker registry.
- Jenkins runs the Docker container in the staging environment.
- Staging the Docker host needs to pull the image from the Docker registry.
- Jenkins runs the acceptance test suite against the application running in the staging environment.
Adding a Dockerfile and commit in Git and and add docker build/push to the jenkins pipeline(Jenkinsfile)
In the root directory of the project, let’s create the acceptance_test.sh file:
#!/bin/bash
test $(curl localhost:8765/sum?a=1\&b=2) -eq 3
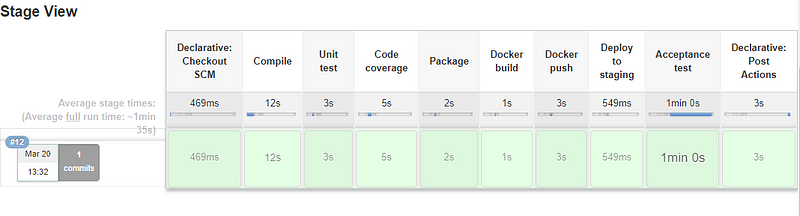
Jenkinsfile
pipeline {
     agent any
     stages {
          stage("Compile") {
               steps {
                    sh "./gradlew compileJava"
               }
          }
          stage("Unit test") {
               steps {
                    sh "./gradlew test"
               }
          }


stage("Package") {
     steps {
          sh "./gradlew build"
     }
}
stage("Docker build") {
     steps {

          sh "docker build -t nikhilnidhi/calculator_1 ."
     }
}
stage("Docker push") {
     steps {
   sh "docker login -u username -p password"
sh "docker push nikhilnidhi/calculator_1"
     }
}
stage("Deploy to staging") {
     steps {

          sh "docker run -d --rm -p 8765:8080 --name calculator_1 nikhilnidhi/calculator_1"
     }
}
stage("Acceptance test") {
     steps {
          sleep 60
          sh "./acceptance_test.sh"
     }
}
     }
  post {
     always {
          sh "docker stop calculator_1"
     }
}
}
For Gradle
Create a freestyle project and use gradle
Configure Gradle -> Manage Jenkins->Global tools configuration->Gradle
and then in the job select Gradle version instead of default.
Setup using Docker-compose
Let’s start with an example and imagine that our calculator project uses the Redis server for caching. In this case, we need an environment with two containers, calculator and redis. let’s create the docker-compose.yml file at the same location.
version: "3"
services:
     calculator:
          image: calculator:latest
          ports:
               - 8080
     redis:
          image: redis:latest
References
Continuous Delivery with Docker and Jenkins. Click Here