With this blog you will get insight into the process of installing Java & Jenkins on AWS ec2 Ubuntu 16.04.
Pre-requisite:
For this lab to proceed, following are the pre-requirements
- Two AWS ec2 instances with AMI as Ubuntu 16.04 being launched.
- One AWS ec2 Ubuntu instance with Apache2 and php installed (Click here to learn their installation).
Installing Java on AWS ec2 Ubuntu 16.04 instance:
Step 1. Sign in to the Console of your AWS account.
Step 2. Connect to the launched Ubuntu instances (via PUTTY if a Windows user)
Step 3. Type the following commands :
sudo apt-get install openjdk-8-jdkStep 4. Check the java version installed
java -version
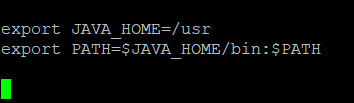
Step 5. In order to help Jenkins( or any Java based application) to point to the JVM (Java Virtual Machine) properly, we are required to set JAVA_HOME environment variable.
Set JAVA_HOME:
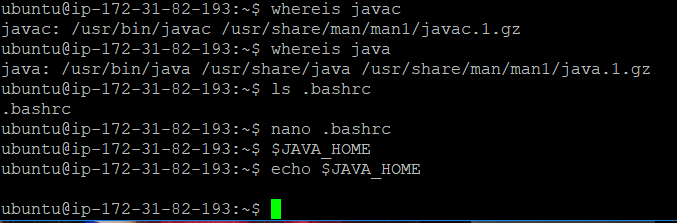
edit the .bashrc (write in the end)
Java 1.8 has been successfully installed. Now, lets move forward and install Jenkins.
Installing Jenkins on AWS ec2 Ubuntu 16.04 instance:
Following steps are used;
Step 1. To use the debian package repository of Jenkins to automate installation and upgrade, first add the following key:
wget -q -O – https://pkg.jenkins.io/debian-stable/jenkins.io.key | sudo apt-key add –
Step 2. Add the following entry in your /etc/apt/sources.list
sudo sh -c 'echo deb https://pkg.jenkins.io/debian-stable binary/ > /etc/apt/sources.list.d/jenkins.list'
Step 3. Now run the following commands:
sudo apt-get update
sudo apt-get install jenkins
Step 4. Go to the browser : <ip_address>:8080

Step 5. Go to the mentioned directory path using cat command in order to view the initialAdminPassword generated by default.
sudo cat /var/lib/jenkins/secrets/initialAdminPassword
Copy the generated password and paste in the “Administrator Password” section as shown above.
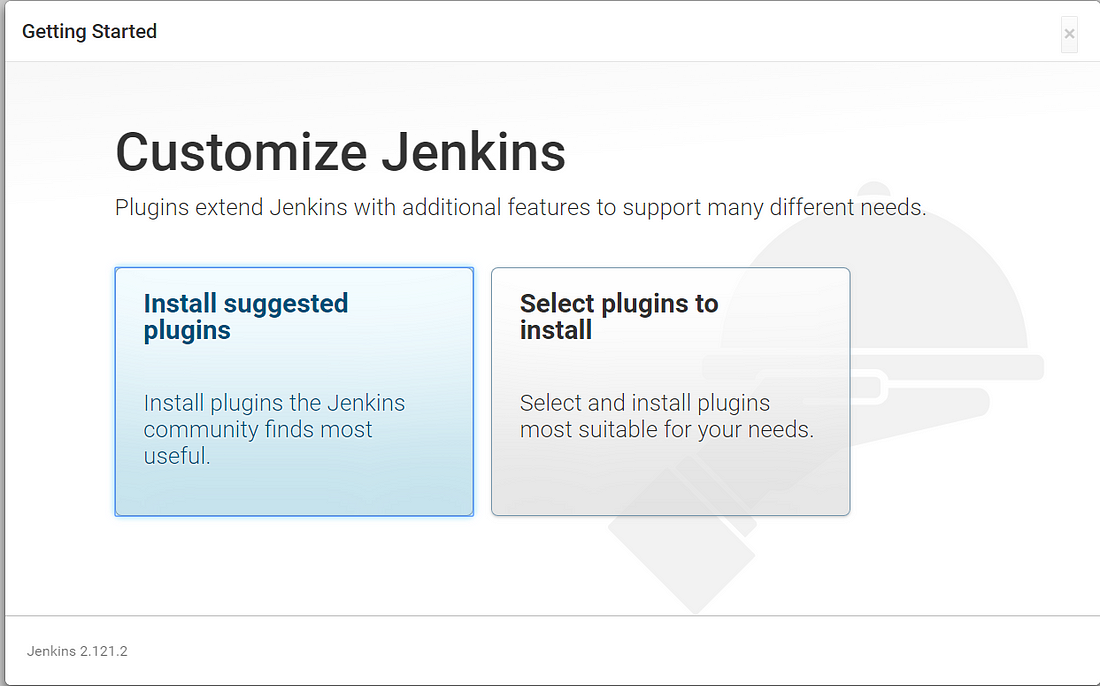
Step 6. Click on the “Install suggested plugins” option.
Step 7. Add first admin user
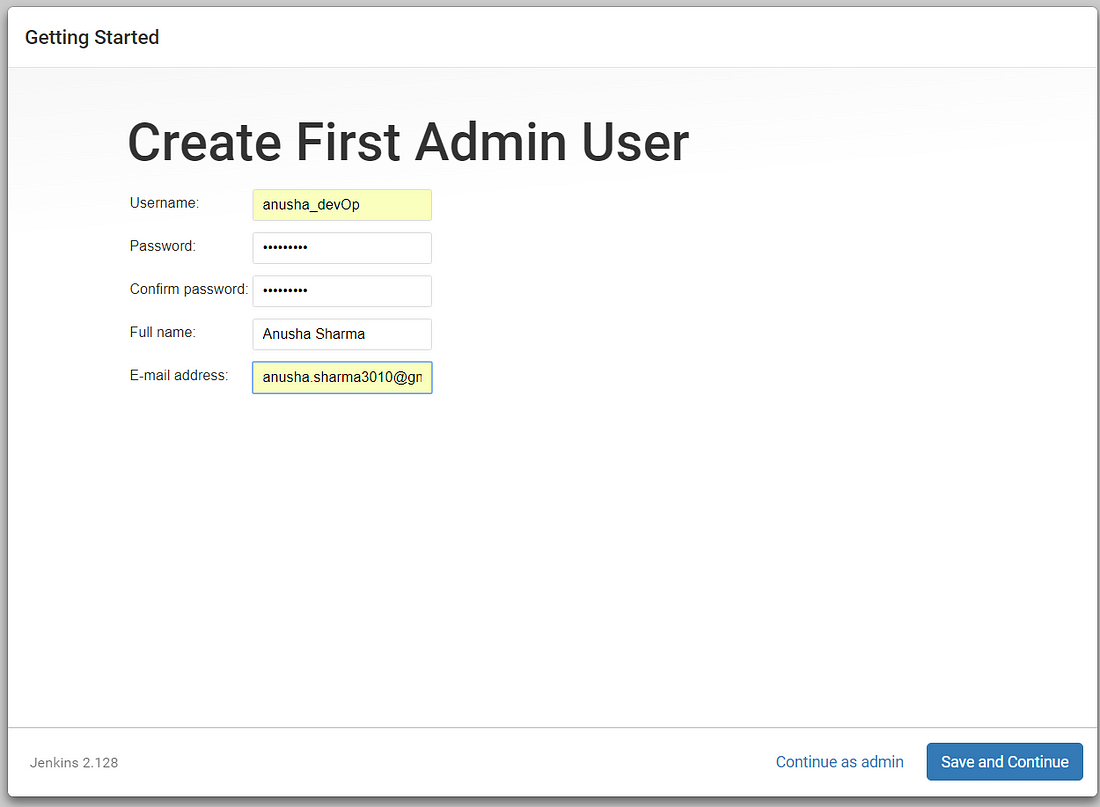
Click Save and Continue.
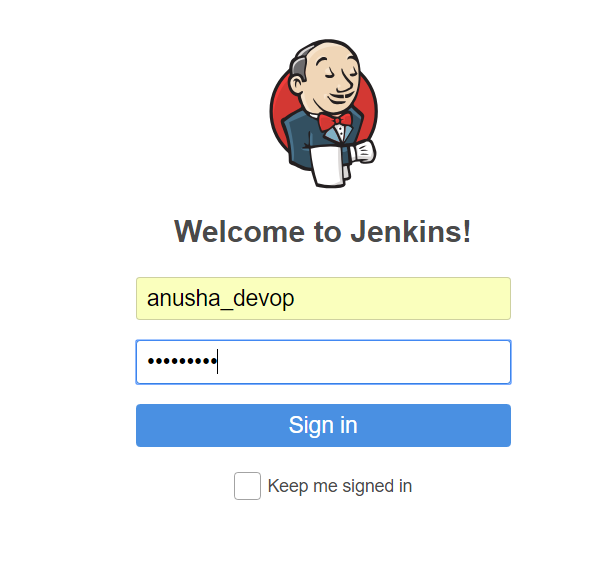
Step 8. Go to your browser and connect to your jenkins server at default port 8080.
<ip_address_of_ec2_ubuntu>:8080
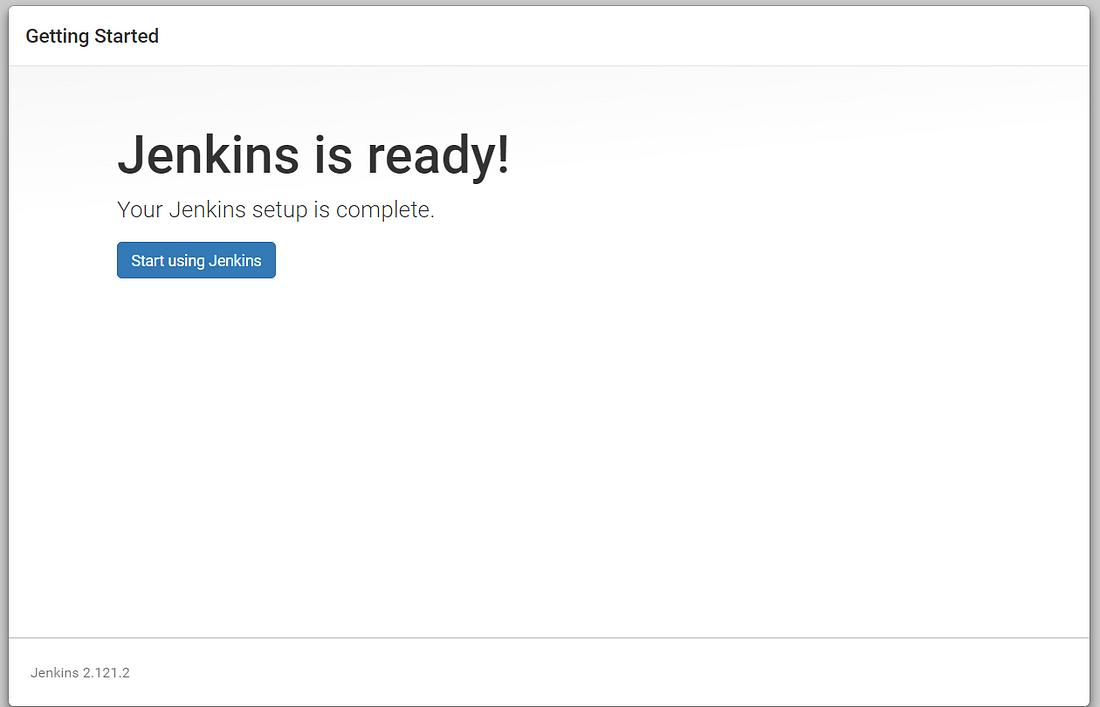
Yay!! Your Jenkins installation is completed on AWS ec2 Ubuntu 16.04 instance.
Further, you also require Git:
Installing Git
sudo apt-get update
sudo apt-get install git-core
Check git version:
git --version

To change password for jenkins:

Congratulations!! Finally ‘installing Java & Jenkins on AWS ec2 Ubuntu 16.04’ lab have been accomplished.
Furthermore, if you want to learn setting up ssh connectivity between two ubuntu instances, click here.