In this blog, we will explore how to check the health of the Kubernetes pods using Liveness and Readiness Probe.
Check out my YouTube video on this blog.
If you are not familiar with basics of Kubernetes pod, please check my blog
Prerequisite:
- Functional Kubernetes Cluster configured
- Kubernetes’ command-line tool, kubectl, which is the command-line interface for running commands against Kubernetes clusters.
- Clone this git repo for all the yaml files which we will be using in this blog
Agenda:
- What is Probes/Health Check
- Pod with a Liveness Probe and No Restart Policy
- Creating a Pod Running a Container with a Liveness Probe and a Restart Policy
- Creating a Pod Running a Container with a Readiness Probe
Probes/Health Checks
- It can be configured to check the health of the containers running in a pod.
- used to determine whether a container is running or ready to receive requests
A probe/health check may return the following results:
Success: The container passed the health check.
Failure: The container failed the health check.
Unknown: The health check failed for unknown reasons.
Types of Probes
- Liveness Probe
- used to determine whether a particular container is running or not.
- If a container fails the liveness probe, the controller will try to restart the pod on the same node according to the restart policy configured for the pod.
Restart Policy
We can define the restart Policy in the pod to instruct the controller about the conditions required to restart the Pod
Default value is always
Values for the Restart Policy as follows
- Always: Always restart the pod when it terminates.
- OnFailure: Restart the pod only when it terminates with failure.
- Never: Never restart the pod after it terminates.
Pod with a Liveness Probe and No Restart Policy
In this yaml file we will define the Liveness Probe and no restart Policy.
If we don’t specify the restart Policy then by default it is always
kind: Pod
apiVersion: v1
metadata:
  name: liveness-probe
spec:
  containers:
  - name: ubuntu-container
    image: ubuntu
    command:
        - /bin/bash
        - -ec
        - touch /tmp/live; sleep 30; rm /tmp/live; sleep 600
    livenessProbe:
       exec:
         command:
            - cat
            - /tmp/live
       initialDelaySeconds: 5
       periodSeconds: 5
Pod configuration
- Creating a container with ubuntu image
- When container starts it will create a file
/tmp/livethen sleep for 30 seconds and at last remove the file/tmp/live - This means the file will be available only for 30 seconds and after that it is no longer available in the container
- In liveness configuration — It will try to find the file every 5 seconds with an initial delay of 5 seconds
initalDelaySeonds : Number of seconds controller will wait before launching the probe
periodSeconds : Number of seconds after which the probe will be repeated periodically
Create a pod
kubectl create -f liveness-probe.yaml
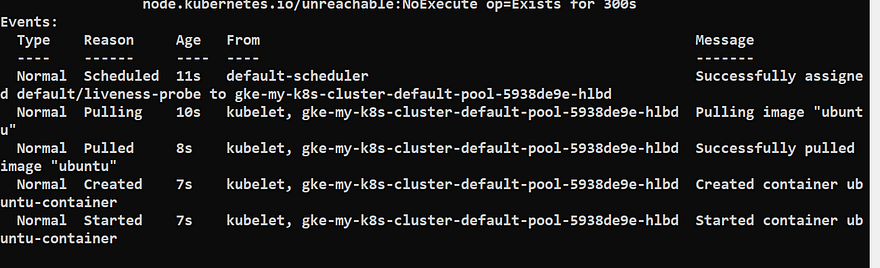
kubectl describe pod liveness-probe
You will see the liveness-probe is succeed because the command is executed successfully
Now wait for 30 seconds and the run the below command
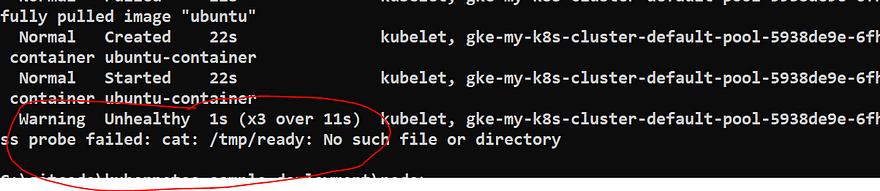
kubectl describe pod liveness-probe
You will see that liveness-probe has failed

Now you can see that container is restarting again and again because of the default Restart policy


Creating a Pod Running a Container with a Liveness Probe and a Restart Policy
Now we will use the same pod configuration but with Restart policy as Never
kind: Pod
apiVersion: v1
metadata:
  name: liveness-probe-never-restart
spec:
  restartPolicy: Never
  containers:
  - name: ubuntu-container
    image: ubuntu
    command:
        - /bin/bash
        - -ec
        - touch /tmp/live; sleep 30; rm /tmp/live; sleep 100
    livenessProbe:
       exec:
         command:
            - cat
            - /tmp/live
       initialDelaySeconds: 5
       periodSeconds: 5
Create a pod
kubectl create -f liveness-probe-with-restart-policy.yaml
Wait for a minute and then run the below command
kubectl describe pod liveness-probe-never-restart


From the output you can see that controller killed the container and never attempted to restart the Pod.
Readiness Probe
- used to determine whether a particular container is ready to receive requests or not.
- For ex- A container which serving a web-application, readiness mean that container has loaded all the static assets, database connection, started the webserver and opened a port to start serving request
What happen if container fails its readiness probe ?
Kubernetes controller will ensure that the pod doesn’t receive any requests.
Readiness Probe States
Failure — is the default state until the readiness probe succeeds.
Success- The container will start receiving requests only after the readiness probe returns with the Success state.
If no readiness probe is configured, the container will start receiving requests as soon as it starts.
Creating a Pod Running a Container with a Readiness Probe
In this yaml file we will define the Readiness Probe
kind: Pod
apiVersion: v1
metadata:
  name: readiness-probe
spec:
  containers:
  - name: ubuntu-container
    image: ubuntu
    command:
        - /bin/bash
        - -ec
        - sleep 30; touch /tmp/ready; sleep 600
    readinessProbe:
       exec:
         command:
            - cat
            - /tmp/ready
       initialDelaySeconds: 10
       periodSeconds: 5
Pod configuration
- Creating a container with ubuntu image
- When container starts it will sleep for 30 seconds and then create file
/tmp/ready - This means the file will be available only after 30 seconds
- In readiness configuration — It will try to find the file every 5 seconds with an initial delay of 10 seconds
Create a pod
kubectl create -f readiness-probe.yaml
kubectl get pod readiness-probe
kubectl describe pod readiness-probe
Wait for a minute and then run the below command
kubectl describe pod readiness-probe
Best Practices while using Probes
Liveness Probes
initialDelaySeconds : should be more then the application start up time so that container doesn’t get stuck in a restart Loop
Readiness Probes
initialDelaySeconds : could be small because we want to enable the traffic to the pod as soon as container is ready