In this blog, we will explore the concept of Kubernetes Controllers and how to use them to create replicated Deployments. We will also explore which controller should we use for a specific use case.
Check out my YouTube video on this blog
Prerequisite:
- Functional Kubernetes Cluster configured
- Kubernetes’ command-line tool, kubectl, which is the command-line interface for running commands against Kubernetes clusters.
- Clone this git repo for all the yaml files which we will be using in this blog
There are different kinds of controllers
- ReplicaSets,
- Deployments,
- DaemonSets
- StatefulSets
- Jobs
Why controllers ?
In my previous blog we have seen how to create a pod and manage its lifecycle manually.
There are various reasons you want to use controllers such as
- Create more than one replica of your pods so that when one pod is down, application can still run on the different pod
- Load Balance across different pods so that an end user will not see any slowness in their application.
A controller is an object that ensures that your application runs in the desired state for its entire runtime
ReplicaSets
A ReplicaSet is a Kubernetes controller that keeps a certain number of Pods running at any given time.
It will terminate or start new Pods to match the configuration specified in the ReplicaSet template
It can be used to reliably run a single Pod indefinitely or to run multiple instances of the same Pod.
Creating a Simple ReplicaSet with nginx Containers
In this yaml file, we have three fields
- Replicas
- Selector
- Template
apiVersion: apps/v1
kind: ReplicaSet
metadata:
  name: nginx-replicaset
  labels:
    app: nginx
spec:
  replicas: 2 #pod selector
  selector:
    matchLabels:
      environment: production
  template: # pod template
    metadata:
      labels:
        environment: production
    spec:
      containers:
      - name: nginx-container
        image: nginx
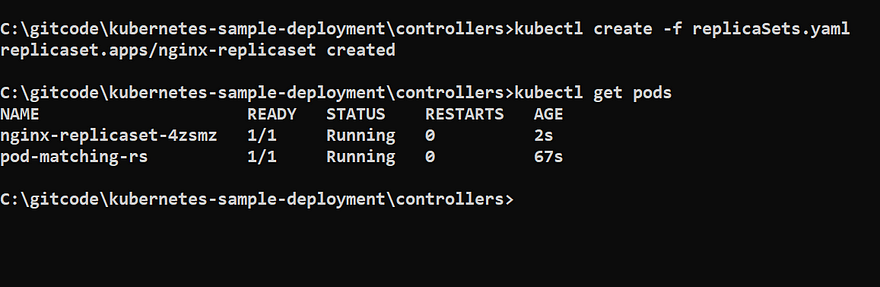
Create a replicaSet
kubectl create -f replicaSets.yaml
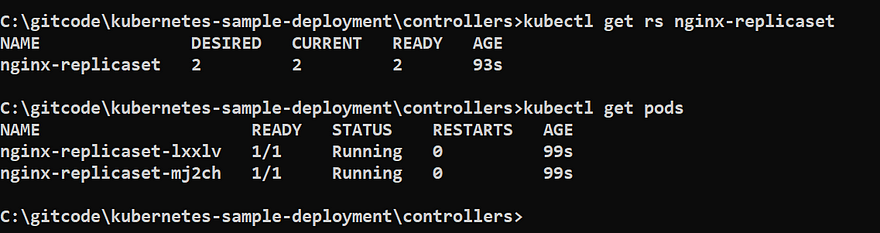
kubectl get rs nginx-replicaset
kubectl get pods
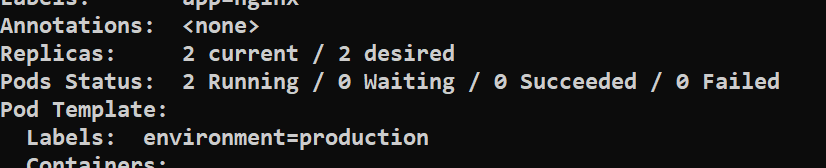
kubectl describe rs nginx-replicaset
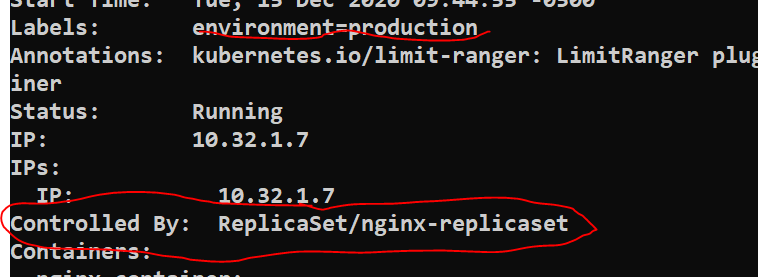
We can also check the pod configuration
kubectl describe pod podname
Deleting Pods Managed by a ReplicaSet
Let’s try to delete a pod
kubectl delete pod nginx-replicaset-lxxlv

Now again check the pods
kubectl get pods

we can see that after a Pod is deleted, the ReplicaSet creates a new Pod using the Pod configuration. Even if we delete all the Pods managed by the ReplicaSet, they will be recreated.
So, to delete all the Pods permanently and to avoid the recreation of the Pods, we need to delete the ReplicaSet itself.
kubectl delete rs nginx-replicaset
Creating a ReplicaSet Given That a Matching Pod Already Exists
First we will create a POD
kind: Pod
apiVersion: v1
metadata:
  name: pod-matching-rs
  labels:
    environment: production
spec:
  containers:
  - name: first-container
    image: nginx
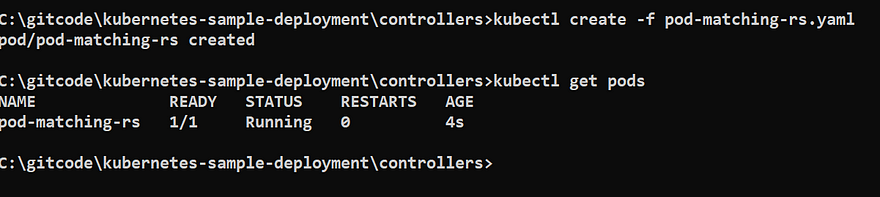
Now we will run our previous yaml which will create a replicaSet object and run the two pods
kubectl create -f replicaSets.yaml
kubectl get pods
You can check whether the manual pod is managed by ReplicaSet or not
kubectl describe pod pod-matching-rs
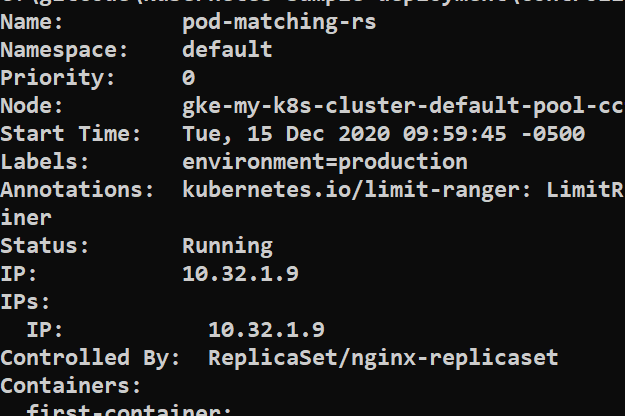
so now when you delete the replicaSet then all pods will get deleted
kubectl delete rs nginx-replicaset
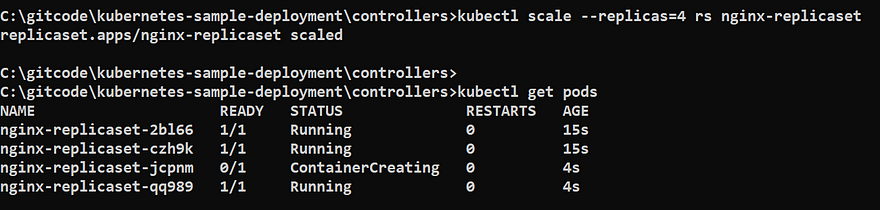
Scale your replicas
kubectl scale --replicas=4 rs nginx-replicaset
We have learnt how to use the ReplicaSet and when we should use this.
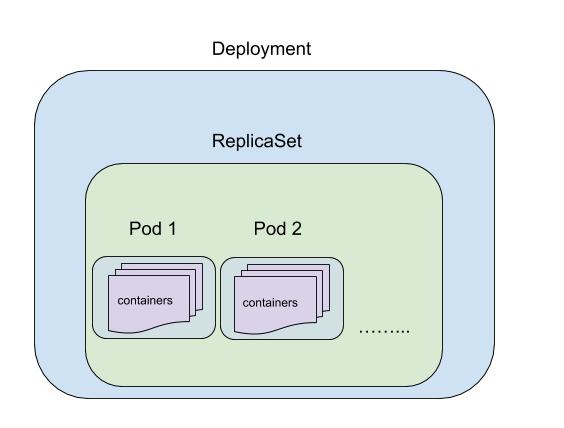
Deployment
A Deployment is a Kubernetes object that acts as a wrapper around a ReplicaSet and makes it easier to use.
It is recommended that we use Deployments that will manage the ReplicaSet and the Pods created by the ReplicaSet.
Few Use cases
- Deployment maintains a history of revisions
- A new revision is created whenever you change anything in replica or pod configuration
- Easily rollback to the previous version
- Each rollback also creates a new revision
Strategy
In the deployment spec we can specify which strategy the Deployment should use when it replaces old pods with new ones.
Two Types of Strategies
RollingUpdate ( default)
- Updates the deployment without downtime
- Controller updates the pod one by one that means every time at least one pod is always running
- With rolling update, there is a chance that at a particular time two versions(old and new) are running for your application. If your application is just serving the static information then this should be fine
- In general, we can use RollingUpdate for applications for which the data stored by a new version can be read and handled by the old version of the application.
spec:
  replicas: 3
  strategy:
     type: RollingUpdate
     rollingUpdate:
       maxUnavailable: 1
       maxSurge: 1
maxUnavailable: This means maximum number of pods can go unavailable while doing the update. You can specify this value either as an integer or a string representing the percentage of total replicas that can be unavailable.
The default value for maxUnavailable is 25%.
maxSurge: is the maximum number of Pods that can be scheduled/created above the desired number of Pods (as specified in the replicas field).You can specify this value either as an integer or a percentage string.
The default value for maxSurge is also 25%.
In the above example, we are telling Kubernetes controller that while updating the pod it can create /scheduled atmost 4 pods and one pod should always be in a running state.
Recreate
- All the existing pods are killed before update
- Downtime will be there while doing the update
- Ensure that application is always running on one version
- This is useful when application can’t be on different version at a particular time.
Creating a Simple Deployment with Nginx Containers
apiVersion: apps/v1
kind: Deployment
metadata:
  name: nginx-deployment
  labels:
    app: nginx
spec:
  replicas: 3
  selector:
    matchLabels:
      app: nginx
      environment: production
  template:
    metadata:
      labels:
        app: nginx
        environment: production
    spec:
      containers:
      - name: nginx-container
        image: nginx
Create a Deployment
kubectl create -f deployment.yaml
kubectl get deployment nginx-deployment
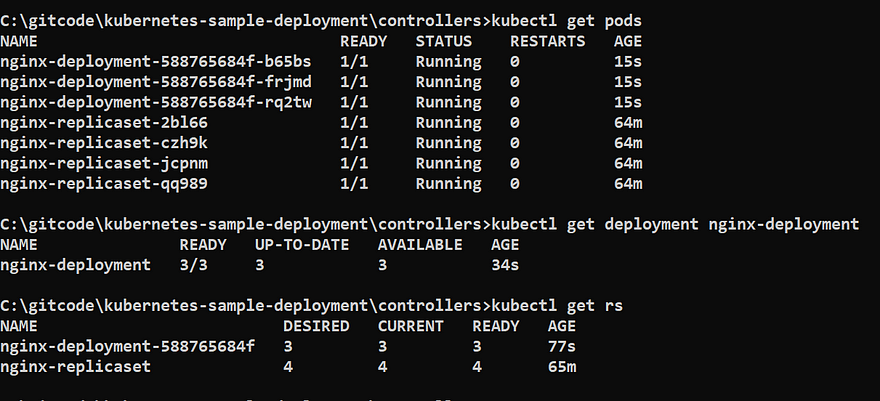
Deployment -> Replica Set -> 3 pods
This is how the naming convention also works.
Rolling Back a Deployment
We can run the below command to check the revision history and rollback.
We should use -recordwhen we use any apply or set commands to modify the Deployment. This flag records the rollout history.
kubectl rollout history deployment <deployment_name>
kubectl rollout undo deployment <deployment_name>
To get more details about the deployment you can refer my blog on specifically Deployment object
StatefulSets
This is used to manage the stateful replicas. This is similar like Deployment which creates and manages the PODS as per the configuration.
How stateful replicas work ?
It maintains a unique identity of the pods. Each pod is different and cannot be interchangeable.
Each of the Pods has a sticky identity that can be used by the application code to manage the state of the application on a particular Pod.
The names of the Pods reflect the integer identity assigned to them. When a StatefulSet is created, all the Pods are created in the order of their integer ordinal.
Each of the Pods managed by a StatefulSet will persist their sticky identity (integer ordinal) even if the Pod restarts.
For example, if a particular Pod crashes or is deleted, a new Pod will be created and assigned the same sticky identity as that of the old Pod.
USE CASES FOR STATEFULSETS
- For the persistent storage. Using a StatefulSet, you can partition the data and store it in different Pods. In this case, it would also be possible for a Pod to go down and a new Pod come up with the same identity and have the same partition of data previously stored by the old Pod.
Daemon Sets
When you want to manage the creation of pods on a selected or on all the nodes that this object is being used.
If we configure a Daemon Set to create Pods on all nodes, then if new nodes are added to the cluster, new pods will be created to run on these new nodes. Similarly, if some nodes are removed from the cluster, the Pods running on these nodes will be destroyed.
Use Cases for DaemonSets
- Logging: We need to run a logging pods on all the nodes so that we can collect metrics from all of them
- Local data caching: A DaemonSet can also be used to manage caching Pods on all the nodes. These Pods can be used by other application Pods to store the cached data temporarily.
- Monitoring: Another use case for a DaemonSet is to manage running monitoring Pods on all the nodes.
All of these controllers (ReplicaSets, Deployment, Statefulets and Daemon Sets) have one common characteristic — they are useful for applications or workloads that are running continuously.
However, sometimes we just want to run a specific pod for a specific task and once the task is complete then we don’t need that pod. For this purpose, Kubernetes provides an object called Job
Jobs
Jobs can be used to manage Pods that are supposed to run a determined task and then terminate gracefully.
Create a Job
apiVersion: batch/v1
kind: Job
metadata:
  name: one-time-job
spec:
  template:
    spec:
      containers:
      - name: busybox-container
        image: busybox
        args:
        - /bin/sh
        - -c
        - date; sleep 20; echo "Bye"
      restartPolicy: OnFailure
Create a pod
kubectl apply -f jobs.yaml
kubectl get jobs
kubectl get pods
kubectl logs -f one-time-job
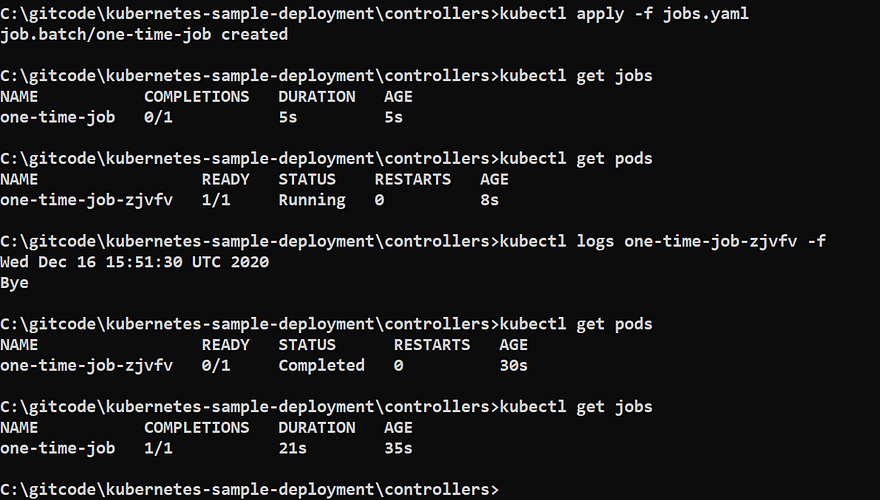
In the above screenshot, you can see that pod is in completed state and job is also successful.
Conclusion:
We have successfully learnt all the Kubernetes objects using examples.
Want to learn more on Kubernetes, refer my website