Check out my Youtube video on this blog
In this blog, we will explore about Kubernetes Labels and Annotation. We will explain their use cases so that we can decide whether to use labels or annotation for a particular use case.
In my previous blog we have already seen different kinds of pods and their life cycle.
In general, we always want to organize our pods based on some properties so that we can query against specific pods. To do so we will be add labels to the pods.
Prerequisite:
- Functional Kubernetes Cluster configured
- Kubernetes’ command-line tool, kubectl, which is the command-line interface for running commands against Kubernetes clusters.
- Clone this git repo for all the yaml files which we will be using in this blog
Agenda:
- Labels
- Pod Create with Labels
- Adding Labels to a Running Pod
- Select Kubernetes objects using Label selector
- Modify/Delete the Label
- Annotation
- Pod create with Annotation
- Modify/Delete the annotation
Labels
- They are are the metadata which contain unique information of the Kubernetes objects
- key-value pair attached to the objects like pod
- We can attach the label at the time of creation or we can update it at runtime
- Kubernetes internally maintains the mappings of labels to corresponding objects using optimized data structures to make these queries faster.
- With labels, you can also run your specific pods on selected nodes.
Organize Pods by team/project/organization
- You can organize pods so that each team will see only their pods
- Specific to certain projects
metadata:
  labels:
     environment: development
     team: infra
     project: k8s-infra
Run a Pod on Specific Nodes
This is a very basic requirement when you want to run your pod on a specific node because of its hardware/specific configuration etc.
We can do that using node-selector
nodeSelector:
  region: east-us
  disktype: ssd
Create a Pod with Labels
kind: Pod
apiVersion: v1
metadata:
  name: pod-with-labels
  labels:
    app: nginx
    foo: bar
spec:
  containers:
  - name: first-container
    image: nginx
Create a pod
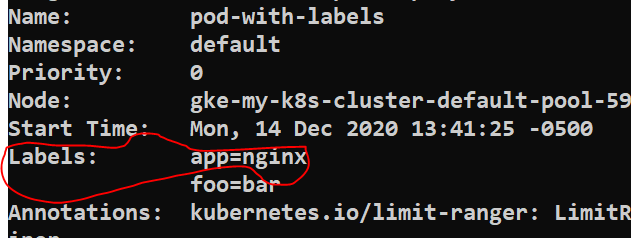
kubectl create -f pod-with-labels.yaml
kubectl describe pod pod-with-labels
Adding Labels to a Running Pod
You can update the existing label or add the new one using below command
kubectl label pod pod-with-labels app=nginx1 --overwrite
kubectl label pod pod-with-labels env=dev
kubectl label pod pod-with-labels team=dev org=abc

How to remove a label
kubectl label pod pod-with-labels env-
Selecting Kubernetes Objects Using Label Selectors
kubectl get pods -l app=nginx1
kubectl get pods -l app=nginx1,foo=bar

Annotation
Annotations are also key-value pairs that can be used to store the unstructured information pertaining to the Kubernetes objects.
It can be used to add timestamps, commit SHA, issue tracker links, or names/information about users who are responsible for specific objects in an organization
It can also be used to add information about client libraries or tools.
kind: Pod
apiVersion: v1
metadata:
  name: pod-with-annotation
  annotation:
    commit-message: testign for nginx
    owner: Nidhi
spec:
  containers:
  - name: first-container
    image: nginx
Create a Pod
kubectl create -f pod-with-annotation.yaml
kubectl describe pod pod-with-annotation
How to add annotation using command line
kubectl annotate pod pod-with-annotation jiralink=DED-232
kubectl annotate --overwrite pod <pod_name> <annotation_key>=<annotation_label>
Delete the annotation
kubectl annotate pod pod-with-annotation jiralink-
You can find more articles on Kubernetes on my website.